Fast Plants Final Reflection

Screenshot 2018-06-03 at 21.10.23
  1. Did the F2 generation look like how you predicted them to look?

The F2 didn’t look how I predicted, I figured the F1 would be the smaller generation but they were in fact larger than the F2. My colors were the same for all of the seeds while I expected them to be different shades.

  1. Did the parent generation or the F2 generation grow faster?

The F2 generation grew faster than the others, the first generation barely grew at all but the F2 grew quick.

  1. What might have hindered your plants' ability to thrive?

What hindered my ability to thrive was the lack of constant care we showed our plants and the general there isn’t a guarantee concept. Maybe it didn’t have enough air or was pushed off the white blanket a couple times so it didn’t receive much water. Other  plants grew very close so maybe some domination occurred.


  1. How do genetics and the environment affect the phenotype of an organism?

The genetics affect the phenotype by having different parent plants. If one is heterozygous and one  homozygous, the offspring will be different. If the environment isn’t up to par this can too affect the outcome of the plant.

5. Which is a greater indicator of how an organism will look?

It will depend on the parents of the plant.

6. A summary of what stood out to you during this course and why.

What stood out to me was how the plants were dying once they were pregnant because I thought they’d need to stay alive to nourish their offspring but they actually die like a lot of insects do. I’ve never had to grow a plant but I’ve had my dad buy me flowers, I see that you have to give them exactly what you did in the beginning in order for them to survive the way you have to do anything in life or it will die.


Fast Plants

Dexter Le

6/1/18

Biochemistry 2


Fast Plants Final Reflection


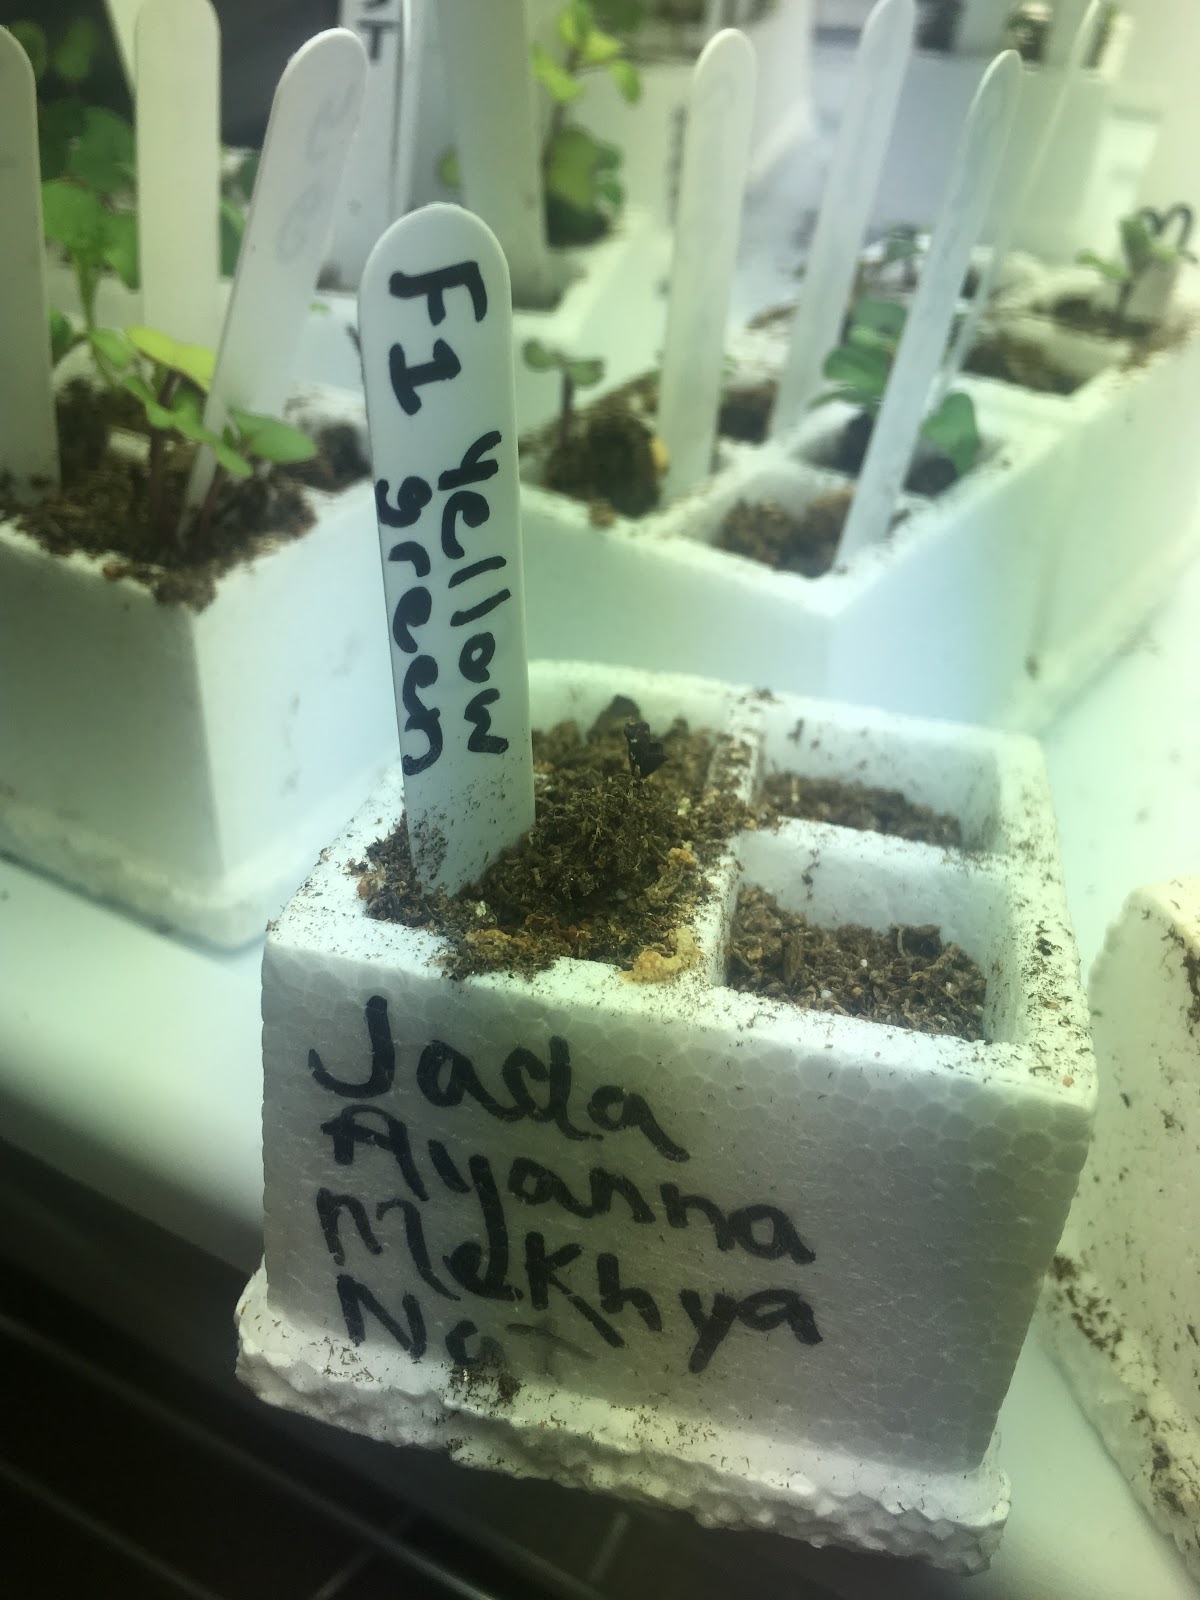
Throughout this semester, I have been observing the plants that our group planted in order to test Mendel’s theory of genetics and inheritance. We had observed two generations of plants, the F1 generation and the F2 generation. For our F1 generation, we had selected the seeds with the “Non-Purple Stem” and “Standard Purple Stem Hairy” traits. These plants would cross-pollinate and create seed pods which would serve as the primary seeds for the F2 generation.


There are also many variables that can play into the effect of each generation’s development such as the nursery and water. The growth of the plant can be severely affected by the environment. According to the United Kingdom Cannabis Social Clubs, the author states, “For plants to photosynthesis and grow they need constant air exchange to refresh the CO2 content of the surrounding air during both day and night periods”. In addition, water is a vital component to plants. Without water, the plants would not be able perform photosynthesis. These challenges affect the plant’s possible phenotypes. When I started analyzing the plant pictures, I have noticed that the development of the F2 generation was very similar to the F1 generation. A similarity was the the developing leaves of the F2 generation. Although the F2 generation did not have as many leaves in comparison to the F1 generation, the first weeks were very similar to the past generation. The parent generation grew faster whereas the F2 generation took some time in order to fully develop. I believe that the slow development of the F2 generation could possibly be the environment changes taking place outside. During the development of the parent generation, we were still going through Winter. Whereas, the F2 generation started development in late Winter and throughout Spring. In addition, the F2 generation was in development through an abnormally cold Spring which I believe could have played an effect on the growth of the generation.


Although in appearance, it seems as if some of the leaves in the F2 generation have different colors and patterns in comparison to the parent generation. We predicted that the F2 generation would have minor differences in comparison to the parent generation. Our prediction was correct because we have noticed colors that have been mixed with the F2 plants from the parent generation. The shape of the plants in the F2 generation resemble the parent generation almost exactly. After observing the pictures over and over, I have realized that the greatest indicator that determines the future of the plant’s appearance would have to be through development. In the F1 generation, you can see mini leaves growing during development. However, at maturity, the plant has retained the same color. This same indicator has also occurred on the F2 generation. At development, it is easy to determine the appearance of the plant as the leaves would grow and retain the color.


In conclusion, the observation of these plants have been fascinating. What stood out from this experiment the most was how Mendel’s Genetic Inheritance theory could visually be seen throughout the experiment. After doing research, I found an article that stated, “ A closer look into the inside of the [plant] cell, however, will show you that the way that genes and chromosomes work is extremely similar in all living things”. This experiment made me realize how similar we are to plants. Offsprings are able to inherit genotypes from their parents which makes them unique. After observing the plants throughout this semester, it was very enlightening seeing the similar characteristics.

Sources:
"Indoor Gardening: How Important Is Airflow And Exchange?." UKCSC. N.p., 2018. Web. 3 June 2018.
"Mendel's Plants | Ask A Biologist." Askabiologist.asu.edu. N.p., 2018. Web. 3 June 2018.
Parent Generation Development
Parent Generation Maturity
F2 Generation Development
F2 Generation Growth

Fast Plants Journey !!!

During this Last semester in Biochem 2. We have been observing fast plants (F1) and their fast plant offspring (F2). At the beginning of this semester, we grew 5 types of fast plants provided by Ms.Aziz.My group chooses to have : (ST)Standard Purple Stem Hairy, (NP)Non-Purple Stem, (YG)Yellow-Green Leaf, and (NG)Non-Purple stem yellow-green leaf with our surprise plant Type “B” that’s purple and green. These plants took about 3 weeks to grow before they were ready to be pollinated. Once they were all pollinated with the “B’ seed, they sprouted about 2 and a half months after. The F2 plants were not successful, because we didn’t look after them as much. Only 2 of the 4 plots had seedling germination, but it didn’t last more than two weeks before it shriveled up and died. Though before they died we saw that the sprout was a purple steam, which came from the B F1 plant.

In this mini project, we found that the F1 plants grew a lot faster than the F2 plants and that they were all able to reproduce a small amount. Some of the factors that could have hindered our F2 plant growth might be water consumption. One reason for this could have been because every time we check the plant it would be dry so we would add extra water. In the parent plant, each plot was moist and rarely dry, but in the F2 plants, the plots were almost always dry. Another factor that could have affected how they grow could have been the amount of light they received. The F1 plants were under the constant light while the F2 plants had a timer that only gave them about 6-7 hours of light each day.

Something that stood out to me in this mini-project was my ability to nature and care for the F1 plants. This is because the F1 plants were able to survive long enough to reproduce and make the second generation. Even with the F1 plants turning out good in every way, I realized that this is always not the case. With the F2 plants, you see that it was not the same and that it was only half the success. As you continue to plant seeds from each generation the outcome will be different/varied.

Q4 Final Project

The image is a self portrait of me showing my emotions on the outside. It shows how tired and drained I am and how sad I be from working long hours at work and going to school. I want my work to communicate the fact that you should take care of yourself and be good on the inside so it won’t show on the outside. For my image I used soft pastels. I wanted everything to look soft as if it would melt if you touch it. This relates to my previous work because my previous work is mostly self-portraits. The process to create was I first did a sketch and then i start on the big areas and shaded the color in then I went in on the little details and then I added anything to it that would make it pop. An artist that has work similar to mine is Frida Kahlo. She makes mostly self portraits that correlate to her personal life. A technique that was important to creating my image was to make sure I put a paper over my work so it doesn’t smudge. A new technique I learned was to rub in the colors with your finger to make it blend better. I am most proud of the fact that I was able to create a product that I imagined in my head. One thing I would change about this is the fact that the canvas I made it on was very small and not able to really showcase my work. Throughout this project I learned how to mix colors very well and I learned how to use soft pastels.
SianniWood
SianniWood

One Point Perspective: Room

  • Describe the room you drew. What is in it? In this room, there is a door leading outside, which is closed, and another door to the right that leads to another room. It also contains hardwood floors with a wool carpet and a coffee table on the carpet. This room has a skylight and and a window (window to the right) and the window has a plant in the sill.
  • What you have learned about one point perspective. I've learned that in one point perspective, rulers are your bet friend.
  • What you are most proud of in your room drawing. I'm most proud of the carpet and coffee table.
  • What you wish you could improve about your room drawing. I wish I could have added color to it.
  • One tip for someone doing this project next year. Make sure you take advantage of the time you have, in class, to work on this project. The due date may come back to bite you.
IMG_7331
IMG_7331

One Point Perspective Project

For my project, I drew a living room. In this project, I learned that when drawing in one point perspective your lines have to be precise and go towards the vanishing point. If it doesn't then it throws the whole drawing off. I am most proud of the couch that I drew because, to be honest, I thought it was going to come out a mess. Surprisingly it didn't. I wish I could improve my floor drawing because I think its kind of messy and confusing when I look at it. One tip for someone else who will do this project is to sit focused because if you make a mistake in your lines it messes up your project. And also pay attention to the tutorials, they help a lot.
IMG_3440
IMG_3440

My Bedroom!!

I tried to draw and recreate my actual room. In my room there is a window with curtains, a bed , a table, a checkered ceiling, a door, a poster with Marilyn Monroe. Also have a wall with my name on it. Doing one point perspective I learned you have to take your time and be very precise with your lines. In my artwork I am most proud of my wall with the window. I wish I could improve on color because I didn't finish coloring. One tip for doing this project is to not get frustrated and just take your time.
IMG_1396
IMG_1396

One Point Perspective Drawing

  • Describe the room you drew. What is in it? 
My room has been freshly moved into, there is no furiture
  • What you have learned about one point perspective.
One point perspective is all based on your vanishing point
  • What you are most proud of in your room drawing.
How percised my lines are
  • What you wish you could improve about your room drawing.
I wish i would have put furniture into it
  • One tip for someone doing this project next year.
It's not as hard as it looks
IMG_0776
IMG_0776

One Point Perspective Drawing

In my room there is a sky roof,posters,widow,dresser,rug,and a bed. What I learned from one point perspective is that it takes time and also its okay if you mess up just keep trying. I'm most proud of making the bed because that was really hard for me. I wish I could add more and also I wish I could make more posters. A tip I would give the people who are going to do this next year is that take your time and if you mess up just erase it an d try again.Also, draw light don't draw hard.  
IMG-0991
IMG-0991

one point perspective

IMG_20180601_144554
IMG_20180601_144554
  • Describe the room you drew. What is in it?

My room has 1 chair, 1 painting on the back wall, 1 table, a nother lower longer table, and a tv ontop of that table. It also has a window with curtains a door and a wooden floor with wooden floor.

  • What you have learned about one point perspective.

Theat is way eaiseier than it seems.

  • What you are most proud of in your room drawing.

Making my door an open door and looking like theres a room behind the room I drew.

  • What you wish you could improve about your room drawing.

My tv looks very weird I wish I could have meade it look as good as the table.

  • One tip for someone doing this project next year.

ALWAYS GO BACK TO THE DOT.


One Point Perspective

I drew my room, with things I want in it. My room includes, a skylight, window, bed, blanket, laptop, 2 pillows, my book bag, a TV, table, water bottles, speakers, a door, a poster with my name on it and curtains, drawers, and hard wood floors. I learned that everything goes back to the vanishing point. I'm proud of my drawling as a whole because drawling isn't my strong suit and it doesn't look that bad so I'm proud that it came out as good as it did. I wish I could improve my lines because they are a little sloppy. A tip I would give someone would be just do the work it's really not hard. 
IMG_0008
IMG_0008

One Point Perspective Drawing

This is my bedroom I have a flat screen tv on my wall with surround sound speakers with my Instagram name on top. I have pull out drawers on the side of my bed to store my things. In the back against the wall I have a desk with my computer. Lastly, in the front of the room in front of my bed is my central air vent.

I learned that if it doesn't align with the vanishing point it will no turn out right and it won't look like it's going to the back.

I'm proud that I didn't give up when I couldn't figure out how to do something. I was also able to finish and I have a very nice room.

I wish I didn't draw as heavy as I did so you won't be able to see my erase marks and it would look more professional.

Make sure you ask for help and pay attention so you would be able to do your room correctly.

IMG_5150
IMG_5150

One Point Perspective

       
The room I drew was my bedroom. In my bedroom is a table with my paint supplies. I personalized my bed with coloring my blanket purple. And adding some pictures to my wall. What I learned about one point perspective is that everything goes back to the vanishing point. I'm most proud of the sunset that I drew in my skylight. I wish I could improve my tile floor and also make my lines straighter. One tip to have when completing this project is to always use a ruler.
IMG_0775
IMG_0775

One Point Perspective Drawing

 The room I drew was anytime of room I put a little details that's in my actual room into the drawing I did. Everything that's in it is windows , table with floors , book shelf , my bed , a picture with " Live , Love , Laugh " on the wall , a rug , and then a rug. What I have learned about one point perspective is that the outcome of it is really nice when you take your time on it. What I'm most proud of in my room drawing is mostly everything because I worked hard on making things the right way. What I wish I could've improved on my room drawing is the certain things that I did in it like my bed I wish I did better , also some of my lines. One tip that I can give to someone that would do this project is that take your time doing it make sure things are coming from the vanishing point. 
IMG_6728
IMG_6728

One point perspective room..

IMG_3574
IMG_3574

 -The picture I drew is a bed room. In my bed room there is a window, a bed, a table and a tile celing.

-What I learned about 1 point perspective is that every line always has to come back to the starting point.

-I'm most proud of my table. I'm most proud of this because It came out the neatest and it was well drawn.

- One thing that I would improve is adding more design. 

-A tip for next year is use time wisely and use a ruler for everything.

1 point perspective

The room I drew have a door, a window, a carpet, a TV, a desk, & a bed. Although my drawing isn't done well, I drew my ideal bedroom that I would like to have one day. The bed have heart shaped lights surrounding the bed because I wanted to have it  look presentable. I have learned how to use this lesson farther and also learned that everything have to go back to the vanishing point. I am most proud of the way I drew my bed. I love the way I drew my bed because it sticks out the most. I wish that I could have spend more time doing this project and wish that I took my time on the door.  One thing I have to say to a 9th grader is to always follow the direction and make sure that everything goes back to the vanishing point. 
20180601_141506
20180601_141506

My bedroom

For this project i decided to do a bedroom. In my bedroom there is a window,mirror,poster, table, along with 2 types a furniture including a table and a bed. Also, i have a flat screen TV, and a bean bag. i have learned many things about this project as i was doing it. I learned that you have to match your drawings up with the vision point in the paper. And i learned that your lines have to be straight if you want your drawing to come out right. There's noting that i am MOST proud of with my drawing because i am proud of everything i drew in my work. One thing i am i wish i could improve on this drawing is that i wish i mad my box smaller so i can have more room with drawing my bed and it would look more decent. For the new freshmen ding this project next year i want you guys to remember you can never rush your work. And make sure you fully understand your work. 

One Point Perspective

The room I drew is a living room. It has a couch, table, flat screen t.v. that is above a fireplace with wood flooring. On the back wall, it has mostly nothing but a bunch of quotes that are suppose to motivate you. I put the quotes there so that wall won't look so plain and boring. What I have learned from one-point perspective drawing is that every thing is suppose to face the vanishing point in the middle of the horizon line. What I am the most proud of in this drawing is the couch because it was the hardest thing to draw. First thing was that all the lines had to go towards the vanishing point and I didn't want it to look flat so I curved the lines to make it look better. What I wish I had improved on is the table in the middle of the room because it doesn't look right with the placement of the couch. A tip when doing this project next year is to draw the furniture before putting the flooring down and to draw lightly first and then darken the lines that you need.

One point Perspective drawing

In my drawing I tried drawing a T.V on and a table and bed. I also tried to a checker floor. What learn about point perspective is that you need it to make 3-d drawing. The one thing I was proud of the ceiling and the floor I think I did well in. One thing I wish to improve on is my bed is looks like a brick. A tip to the new freshmen is to use the website because it make s the project much easier. 
IMG-0072
IMG-0072

One Point Perspective

The room that I drew is the room I think of if first, I had my own room, and second if my room was bigger. In my room I have a bed, a bench drawer, two windows( one big, one small), a door with a sign, a mirror, and a light. I also have little accessories, like the sign on the door and the pillows. Creating this picture, I have learned that with one point perspective it is best that you are precise and that your lines are straight. You can always tell when something is off about a one point perspective drawing. I am most proud of my wall with the polka dots on it because it looks great as an accent wall and fits well with the room. I am also very proud of the bed I made because of the articulate details. I wish I could improve on making sure my lines are ALL equivalent and also coloring at a little more objects in the room. If you were to do this project, please take your time. Every single line counts as a whole.


Screenshot 2018-06-01 at 2.32.16 PM

one point perspective drawing elise

the room that i drew is a parlor that contains a couch and a piano. it has a number of paintings and a couple windows. ive learned that one point perpsective also applies to circular objects. im most proud of the piano i drew, because it looks really good and consistently applies one point perspective. i wish i could have gone over it with the sharpie pen better and gone over it with straighter lines. i also wish i could have done the paintings better and in more detail. for someone doing the project next year i would tell them to use a ruler and make sure that everything goes towards the vantage point. 
c3eb25e1-8e76-4c45-a32f-eb90342c793e